Securely Deploy MCP on Kubernetes
The Model Context Protocol (MCP) is an open protocol introduced by Anthropic that has emerged as the standard for integrations between Large Language Models (LLMs) and external tools and resources. Unfortunately, MCP servers introduce novel security risks including LLM prompt injection, data exfiltration, and execution environment exploits, among others.
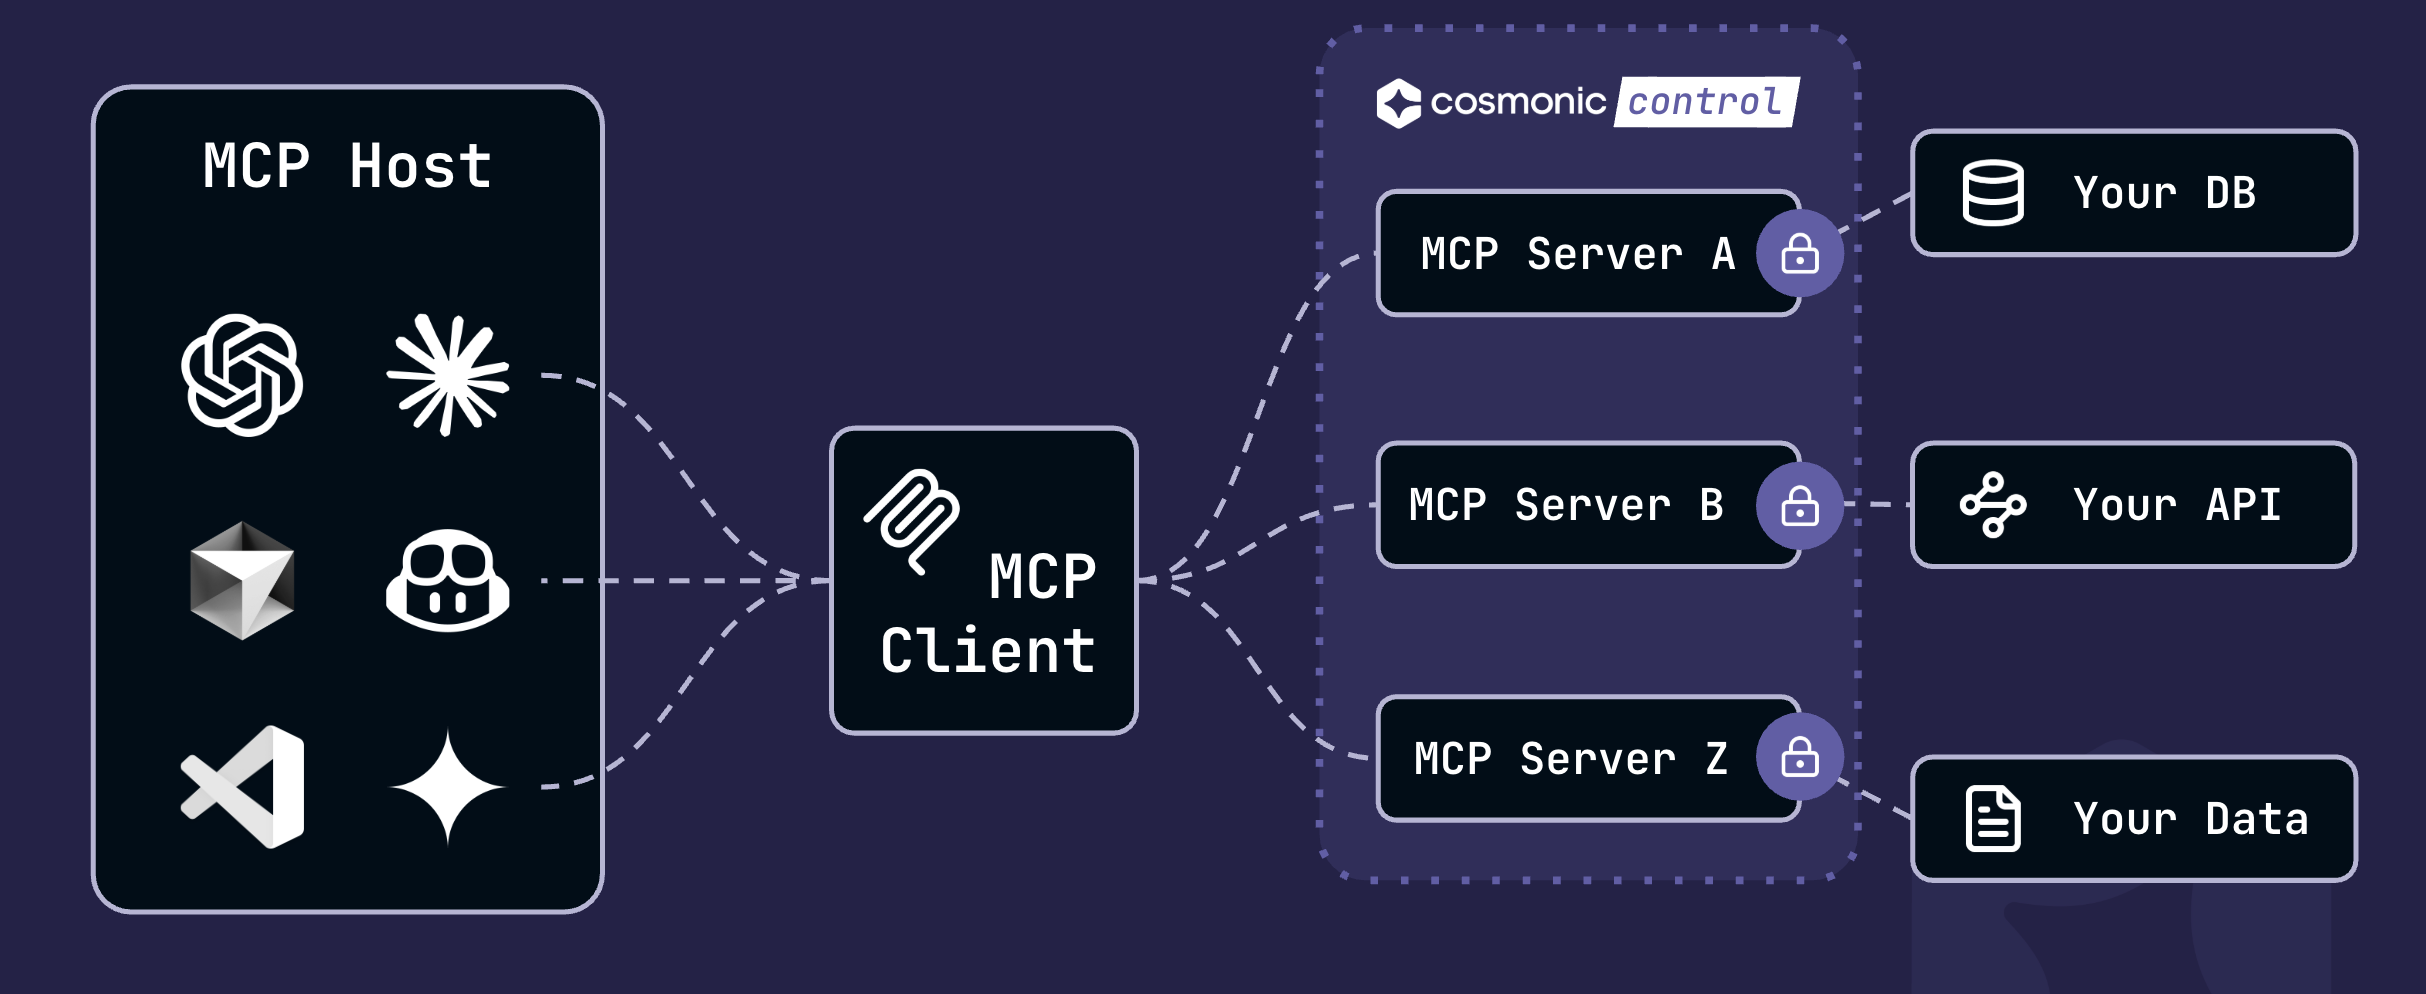
WebAssembly (Wasm) components mitigate agentic AI security risks by providing a secure-by-default unit of deployment. Since Wasm component binaries are portable sandboxes that interact with the outside world via explicitly enabled, language-agnostic interfaces, MCP servers can be deployed as components with the confidence that agents can only interact with approved tools and resources in approved ways.
Sandbox MCP and deploy on Kubernetes
Requirements:
node- NodeJS runtimenpm- Node Package Manager (NPM) manages packages for the NodeJS ecosystemwash- Wasm Shell (for developing and building Wasm components) with the openapi2mcp plugin
Install OpenAPI2MCP
The OpenAPI2MCP plugin generates a TypeScript-based MCP server from 3.0.+ OpenAPI specifications.
Download the OpenAPI2MCP plugin:
wash plugin install ghcr.io/cosmonic-labs/openapi2mcp:v0.5.0
You should see the output:
Plugin 'openapi2mcp' installed successfully from 'ghcr.io/cosmonic-labs/openapi2mcp:v0.5.0'
Generate MCP server
Create a new project based on the MCP server template and navigate to the project directory:
wash new petstore --git https://github.com/cosmonic-labs/mcp-server-template-ts.git
cd petstore
Use curl to download the PetStore API to your project directory:
# same openapi from https://petstore3.swagger.io/api/v3/openapi.json but with a server url
curl -fLO https://raw.githubusercontent.com/cosmonic-labs/openapi2mcp/refs/heads/main/tests/petstore/input.json
Now we'll use wash to generate the MCP server from this JSON document:
wash openapi2mcp input.json
Wasm Shell will ask for permission to execute the shell commands that build out your new project. Answer Yes at each prompt. When the process is complete, your MCP server will be ready.
Developing the MCP server
Start a development loop:
wash dev
The MCP server will run at http://127.0.0.1:8000/v1/mcp. When you start the development loop, wash will automatically launch the MCP Model Inspector.
Use the MCP Model Inspector
The official MCP model inspector is a useful tool for developing and debugging components. Using the model inspector, you can connect to the local MCP server via HTTP, manipulate resources, run tools, and more.
When you run wash dev, wash automatically launches the model inspector in your browser, pre-populated with the configuration you need to connect to your server.
Simply click Connect to connect the inspector to your server. The options should be configured as below:
- Transport Type: Streamable HTTP
- URL:
http://127.0.0.1:8000/v1/mcp
Connect to a model
Testing the MCP server requires access to a model that acts as an MCP host. There are many ways to connect a model with your server—below we've outlined two approaches:
- Use Goose as a client for models in MCP development workflows. You can configure Goose to connect to a variety of models including Claude, ChatGPT, Gemini, locally-hosted open source LLMs, and more. (You can follow this approach for free and without creating accounts for other services.)
- Use ngrok to forward your local MCP server to a public HTTPS address so that MCP Hosts that require a signed certificate like Claude can connect.
Goose: Configuration and usage
Goose is an open source AI agent with the ability to connect to MCP Servers for development workflows. Follow the instructions in the Goose documentation to install Goose.
You'll need a MCP Host (like Goose, VS Code, etc) with tool-calling capabilities to test a MCP server. Otherwise, you can use the LLM model of your choice. Some AI assistants such as Google Gemini offer a free tier. In this example, we used Google Gemini (gemini-2.5-flash-lite-preview-06-17).
Follow the instructions in the Goose documentation to configure your LLM of choice.
Goose refers to connected MCP servers as extensions. To add a new extension (i.e., configure Goose to act as an MCP client and connect to your MCP server), first run:
goose configure
Next...
- Select Add Extension
- Select Remote Extension (Streaming HTTP)
- Call the extension
petstore - Set the Streaming HTTP endpoint URI to
http://127.0.0.1:8000/v1/mcp - You can set the timeout to the default
300
Using the Goose CLI, start a new LLM session:
goose session
Give the Goose CLI a prompt like:
What pets are available for adoption?
Different models will produce different results—you may have to adjust the prompt to something like, Which pets have the status available in the petstore? The Goose CLI should use your MCP server to return results from Swagger's Petstore V3:
( O)> What pets are available for adoption?
─── get_pet_find_by_status | petstore ──────────────────────────
status: available
Here are the pets currently available in the petstore:
* Dog 1 (ID: 4)
* Lion 1 (ID: 7)
* Lion 2 (ID: 8)
* Dog (ID: 123)
* MyPet (ID: 99999999)
...
In your MCP Inspector, you can compare the returned results with the JSON results for a direct tool call in the Tools tab.
ngrok: Configuration and usage
ngrok is an API gateway that can be used to forward your local MCP server to a public HTTPS address. Note that you will need to sign up for an ngrok account.
Follow the instructions in the ngrok documentation to install the ngrok CLI and connect your account.
Once the CLI is installed and connected, forward your local server:
ngrok http http://localhost:8000
Visit the site ngrok serves to enable the route, and copy the forwarding URL for future use. Note that adding the connection to Claude requires an endpoint of $FORWARDING_URL/v1/mcp.
Once connected, you can give your model a prompt like:
What pets are available for adoption?
Different models will produce different results—you may have to adjust the prompt to something like, Which pets have the status available in the petstore? The Goose CLI should use your MCP server to return results from Swagger's Petstore V3:
( O)> What pets are available for adoption?
─── get_pet_find_by_status | petstore ──────────────────────────
status: available
Here are the pets currently available in the petstore:
* Dog 1 (ID: 4)
* Lion 1 (ID: 7)
* Lion 2 (ID: 8)
* Dog (ID: 123)
* MyPet (ID: 99999999)
...
In your MCP Inspector, you can compare the returned results with the JSON results for a direct tool call in the Tools tab.
Build and publish
Compile the component:
wash build
The .wasm binary will output to ./dist.
Push the image to a registry
Push your Wasm binary to a registry as an OCI artifact. (For more information on pushing to registries with wash, see the Developer Guide.)
wash oci push ghcr.io/<your-namespace>/<your project name>:0.1.0 ./dist/component.wasm
If you used our MCP server template, GitHub worklows for publishing on a release is an included workflow. To trigger a push to to the repository's packages, create a new release.
- Go to "Releases" from your project's GitHub repo page
- Click "Draft a new release"
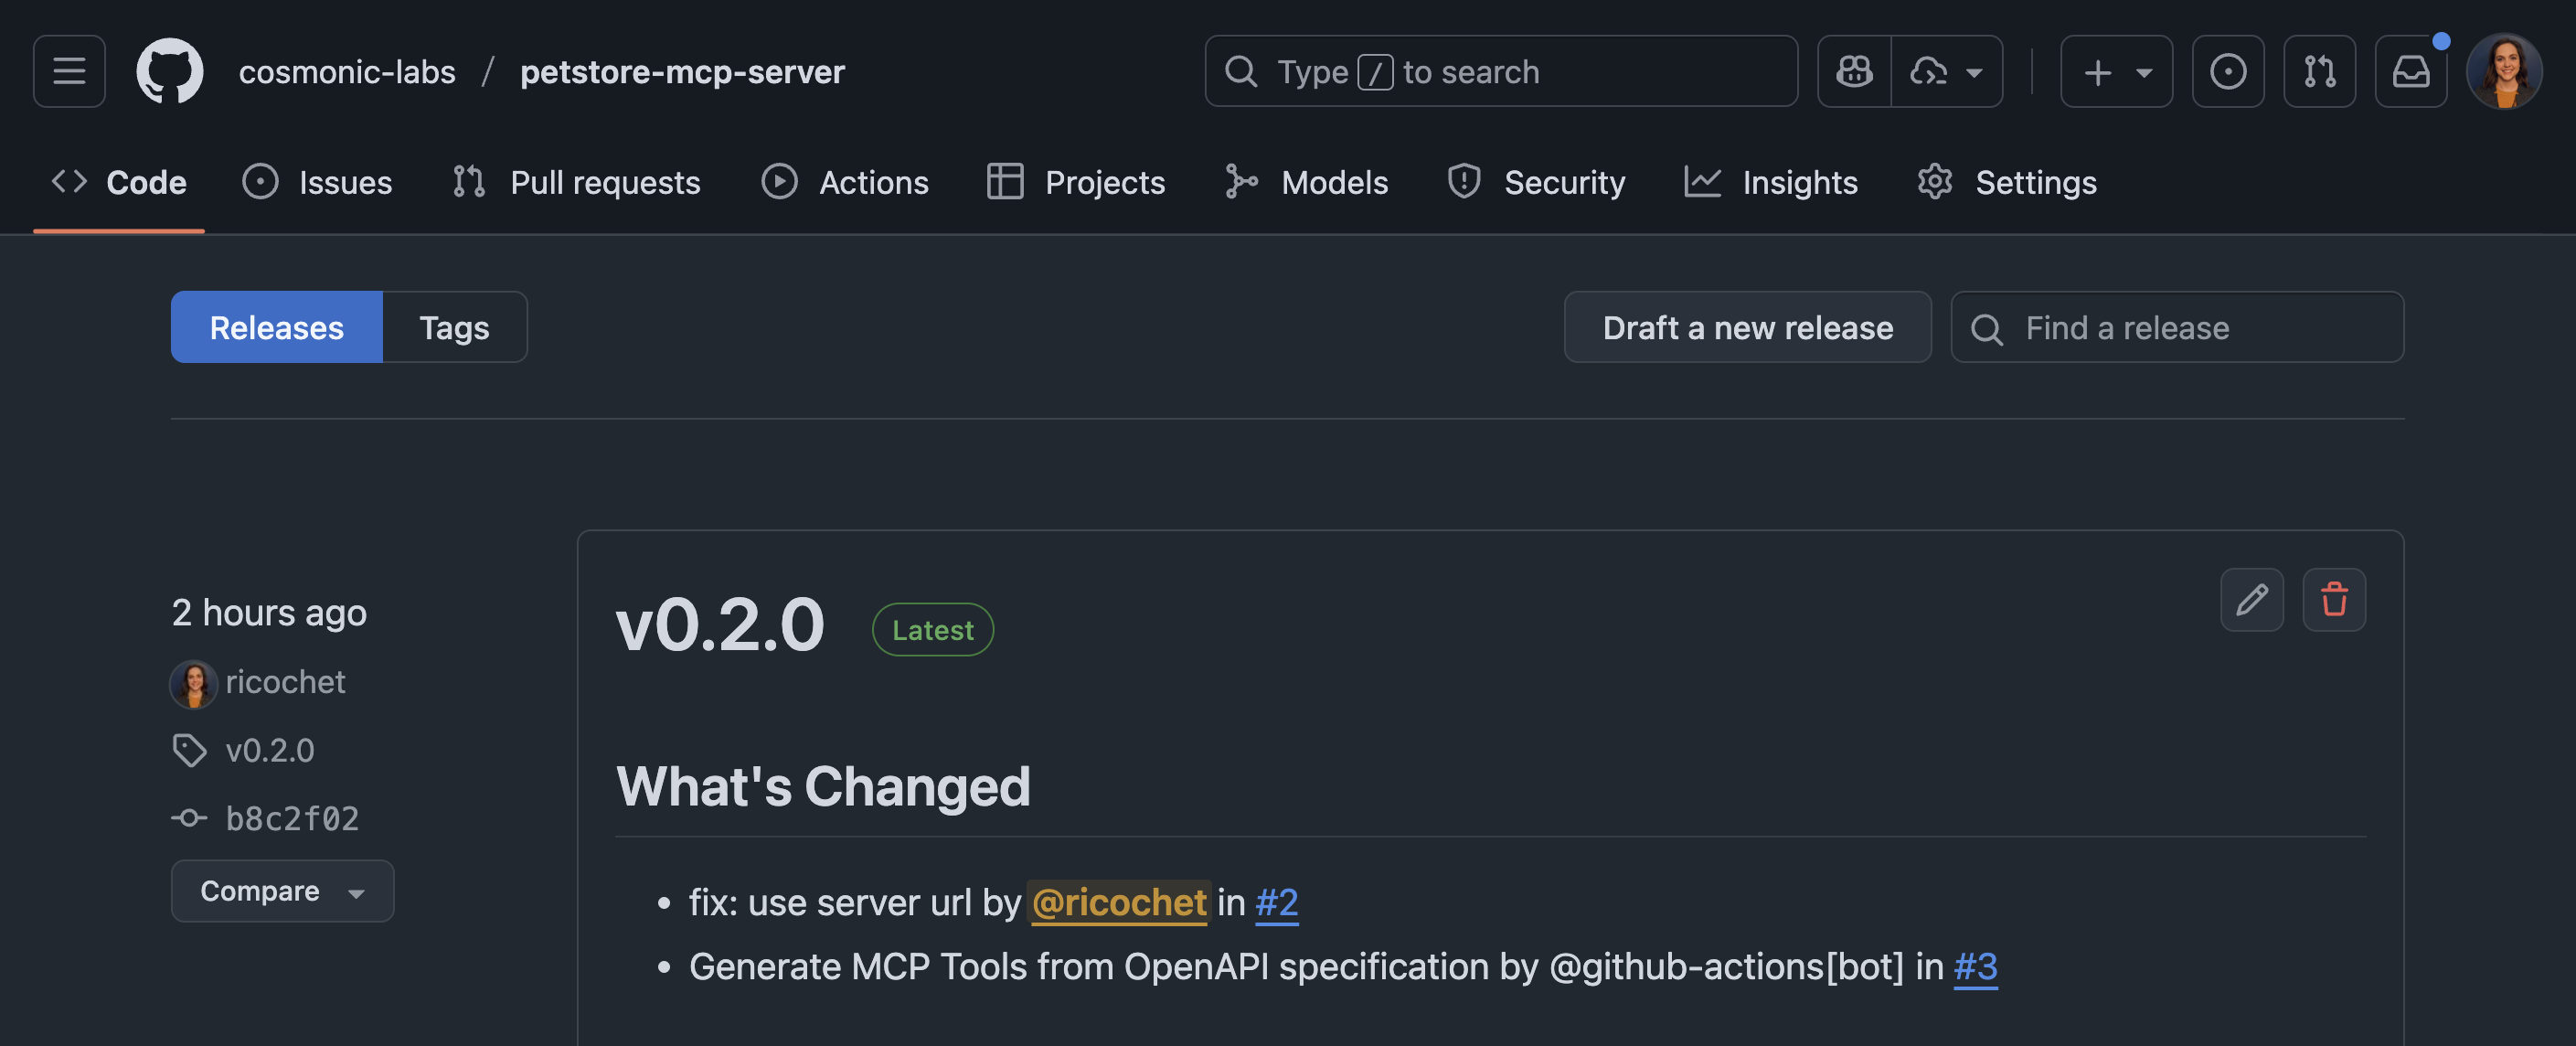
- Create a new tag with the next version (e.g.
v0.3.0)
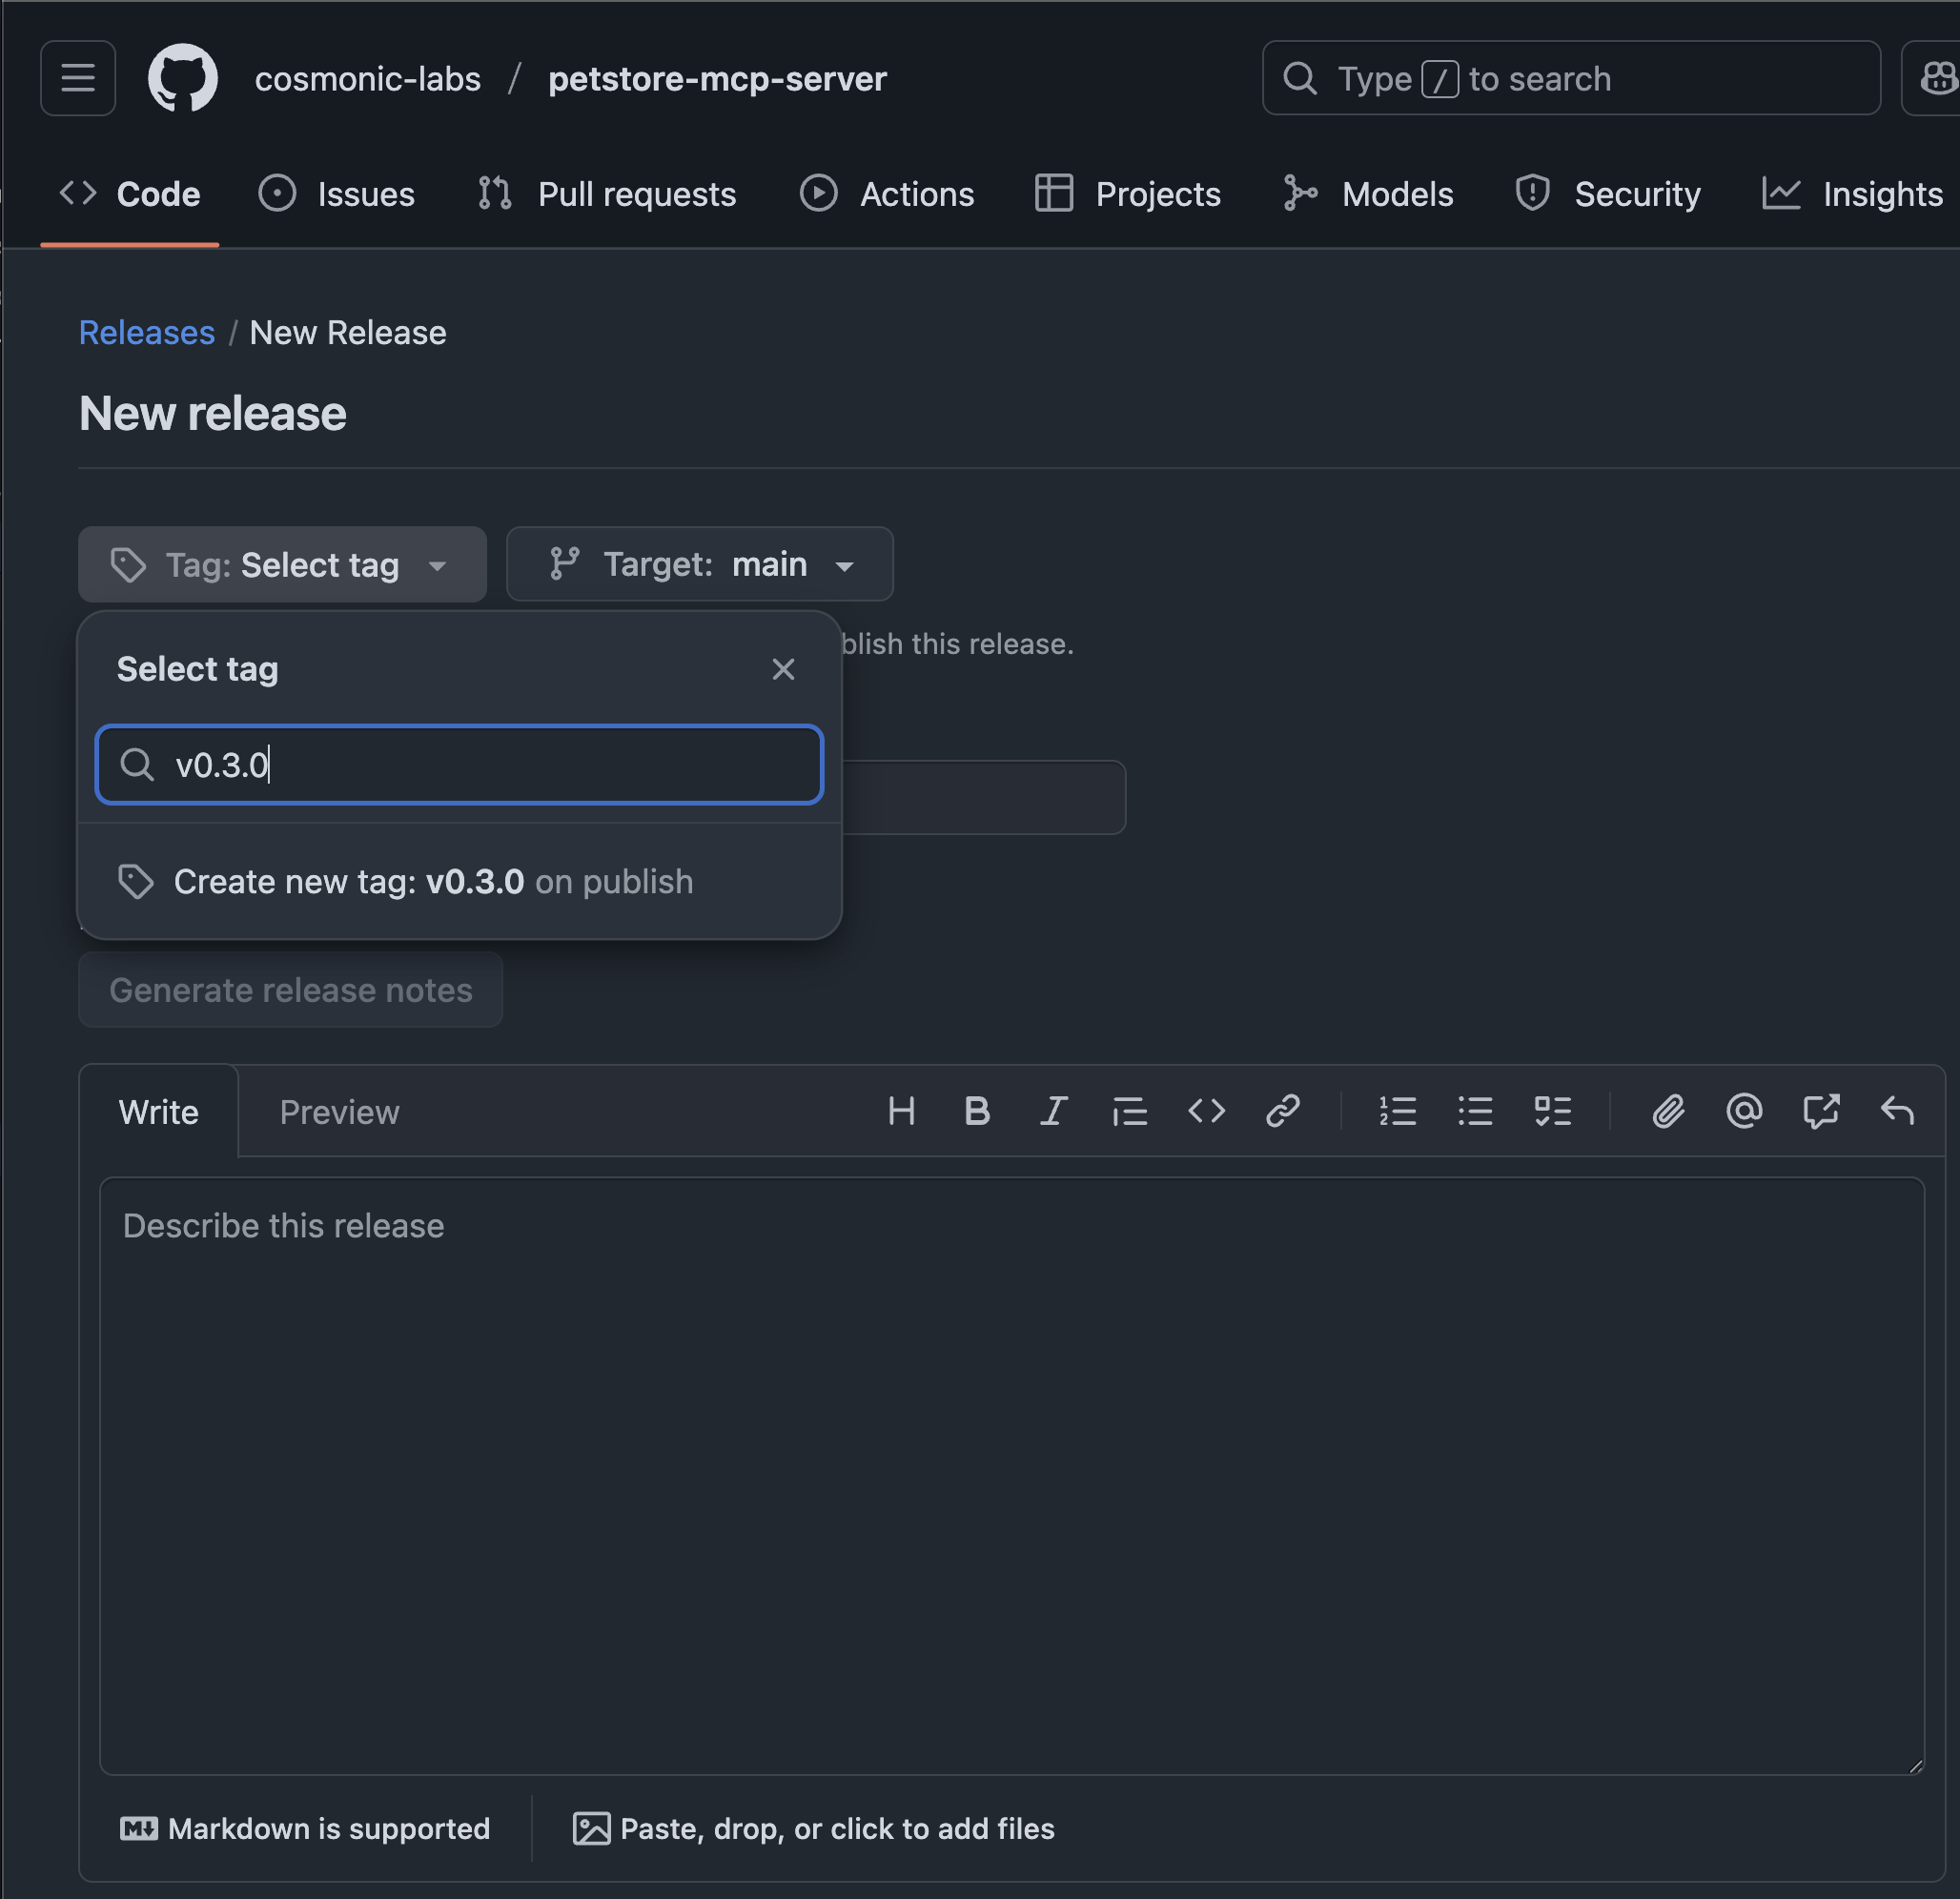
- Fill in the release details, for example name the release v0.3.0
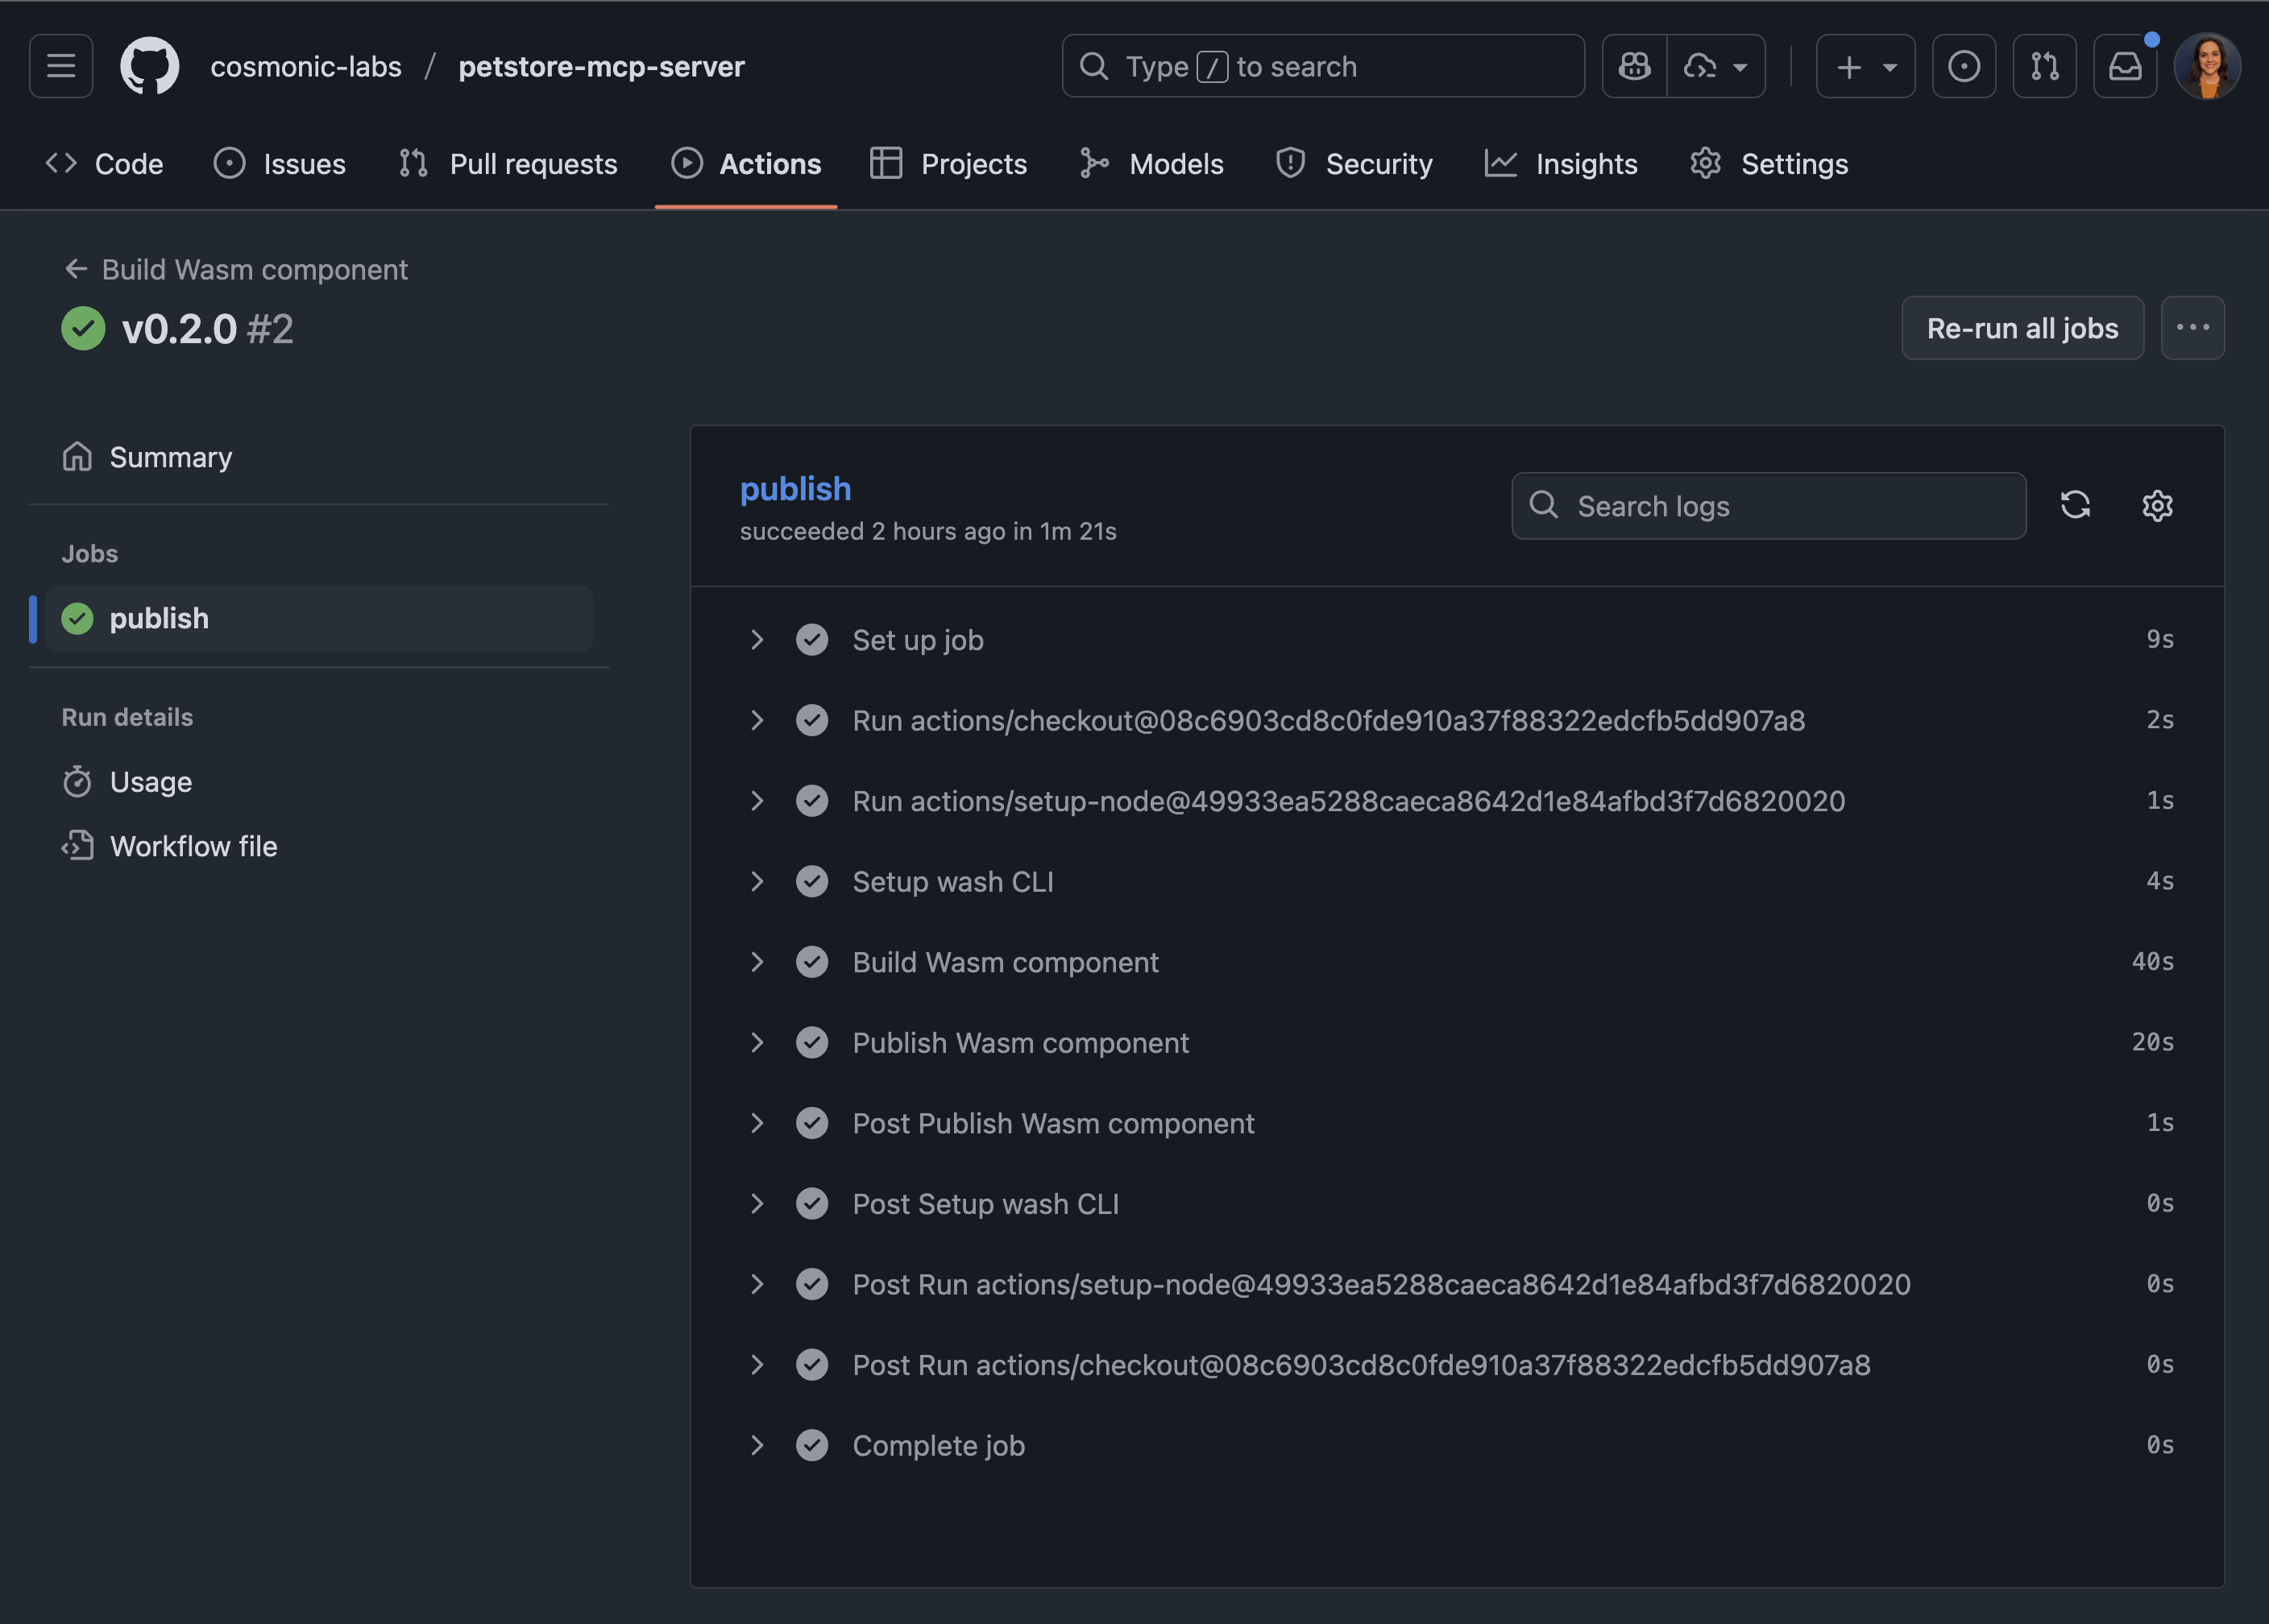
- Click "Publish release" A successful publish workflow will look like the following:
Whether using the GitHub workflows included in the template or pushing manually, if you're using GHCR, the uploaded OCI artifact's Visibility will default to Private. Make the artifact Public.
Deploy to Kubernetes
You will need a Kubernetes cluster and an installation of Cosmonic Control to deploy the component. Sign-up for Cosmonic Control's free trial and follow the Get Started instructions in the Cosmonic Control documentation.
Requirements:
Install Local Kubernetes Environment
For the best local Kubernetes development experience, we recommend installing kind with the following kind-config.yaml configuration:
kind: Cluster
apiVersion: kind.x-k8s.io/v1alpha4
# One control plane node and three "workers."
nodes:
- role: control-plane
  extraPortMappings:
  - containerPort: 30950
    hostPort: 80
    protocol: TCP
This will help enable simple local ingress with Envoy.
Start the cluster:
kind create cluster --config=kind-config.yaml
Install Cosmonic Control
You'll need a trial license key to follow these instructions. Sign up for Cosmonic Control's free trial to get a key.
Deploy Cosmonic Control to Kubernetes with Helm:
helm install cosmonic-control oci://ghcr.io/cosmonic/cosmonic-control\
  --version 0.3.0\
  --namespace cosmonic-system\
  --create-namespace\
  --set envoy.service.type=NodePort\
  --set envoy.service.httpNodePort=30950\
  --set cosmonicLicenseKey="<insert license here>"
Deploy a HostGroup:
helm install hostgroup oci://ghcr.io/cosmonic/cosmonic-control-hostgroup --version 0.3.0 --namespace cosmonic-system
Use the HTTPTrigger chart to quickly and easily deploy your MCP server:
helm install petstore-mcp --version 0.1.2 oci://ghcr.io/cosmonic-labs/charts/http-trigger -f https://github.com/cosmonic-labs/control-demos/blob/main/petstore-mcp/values.http-trigger.yaml
Connect to the deployed MCP server
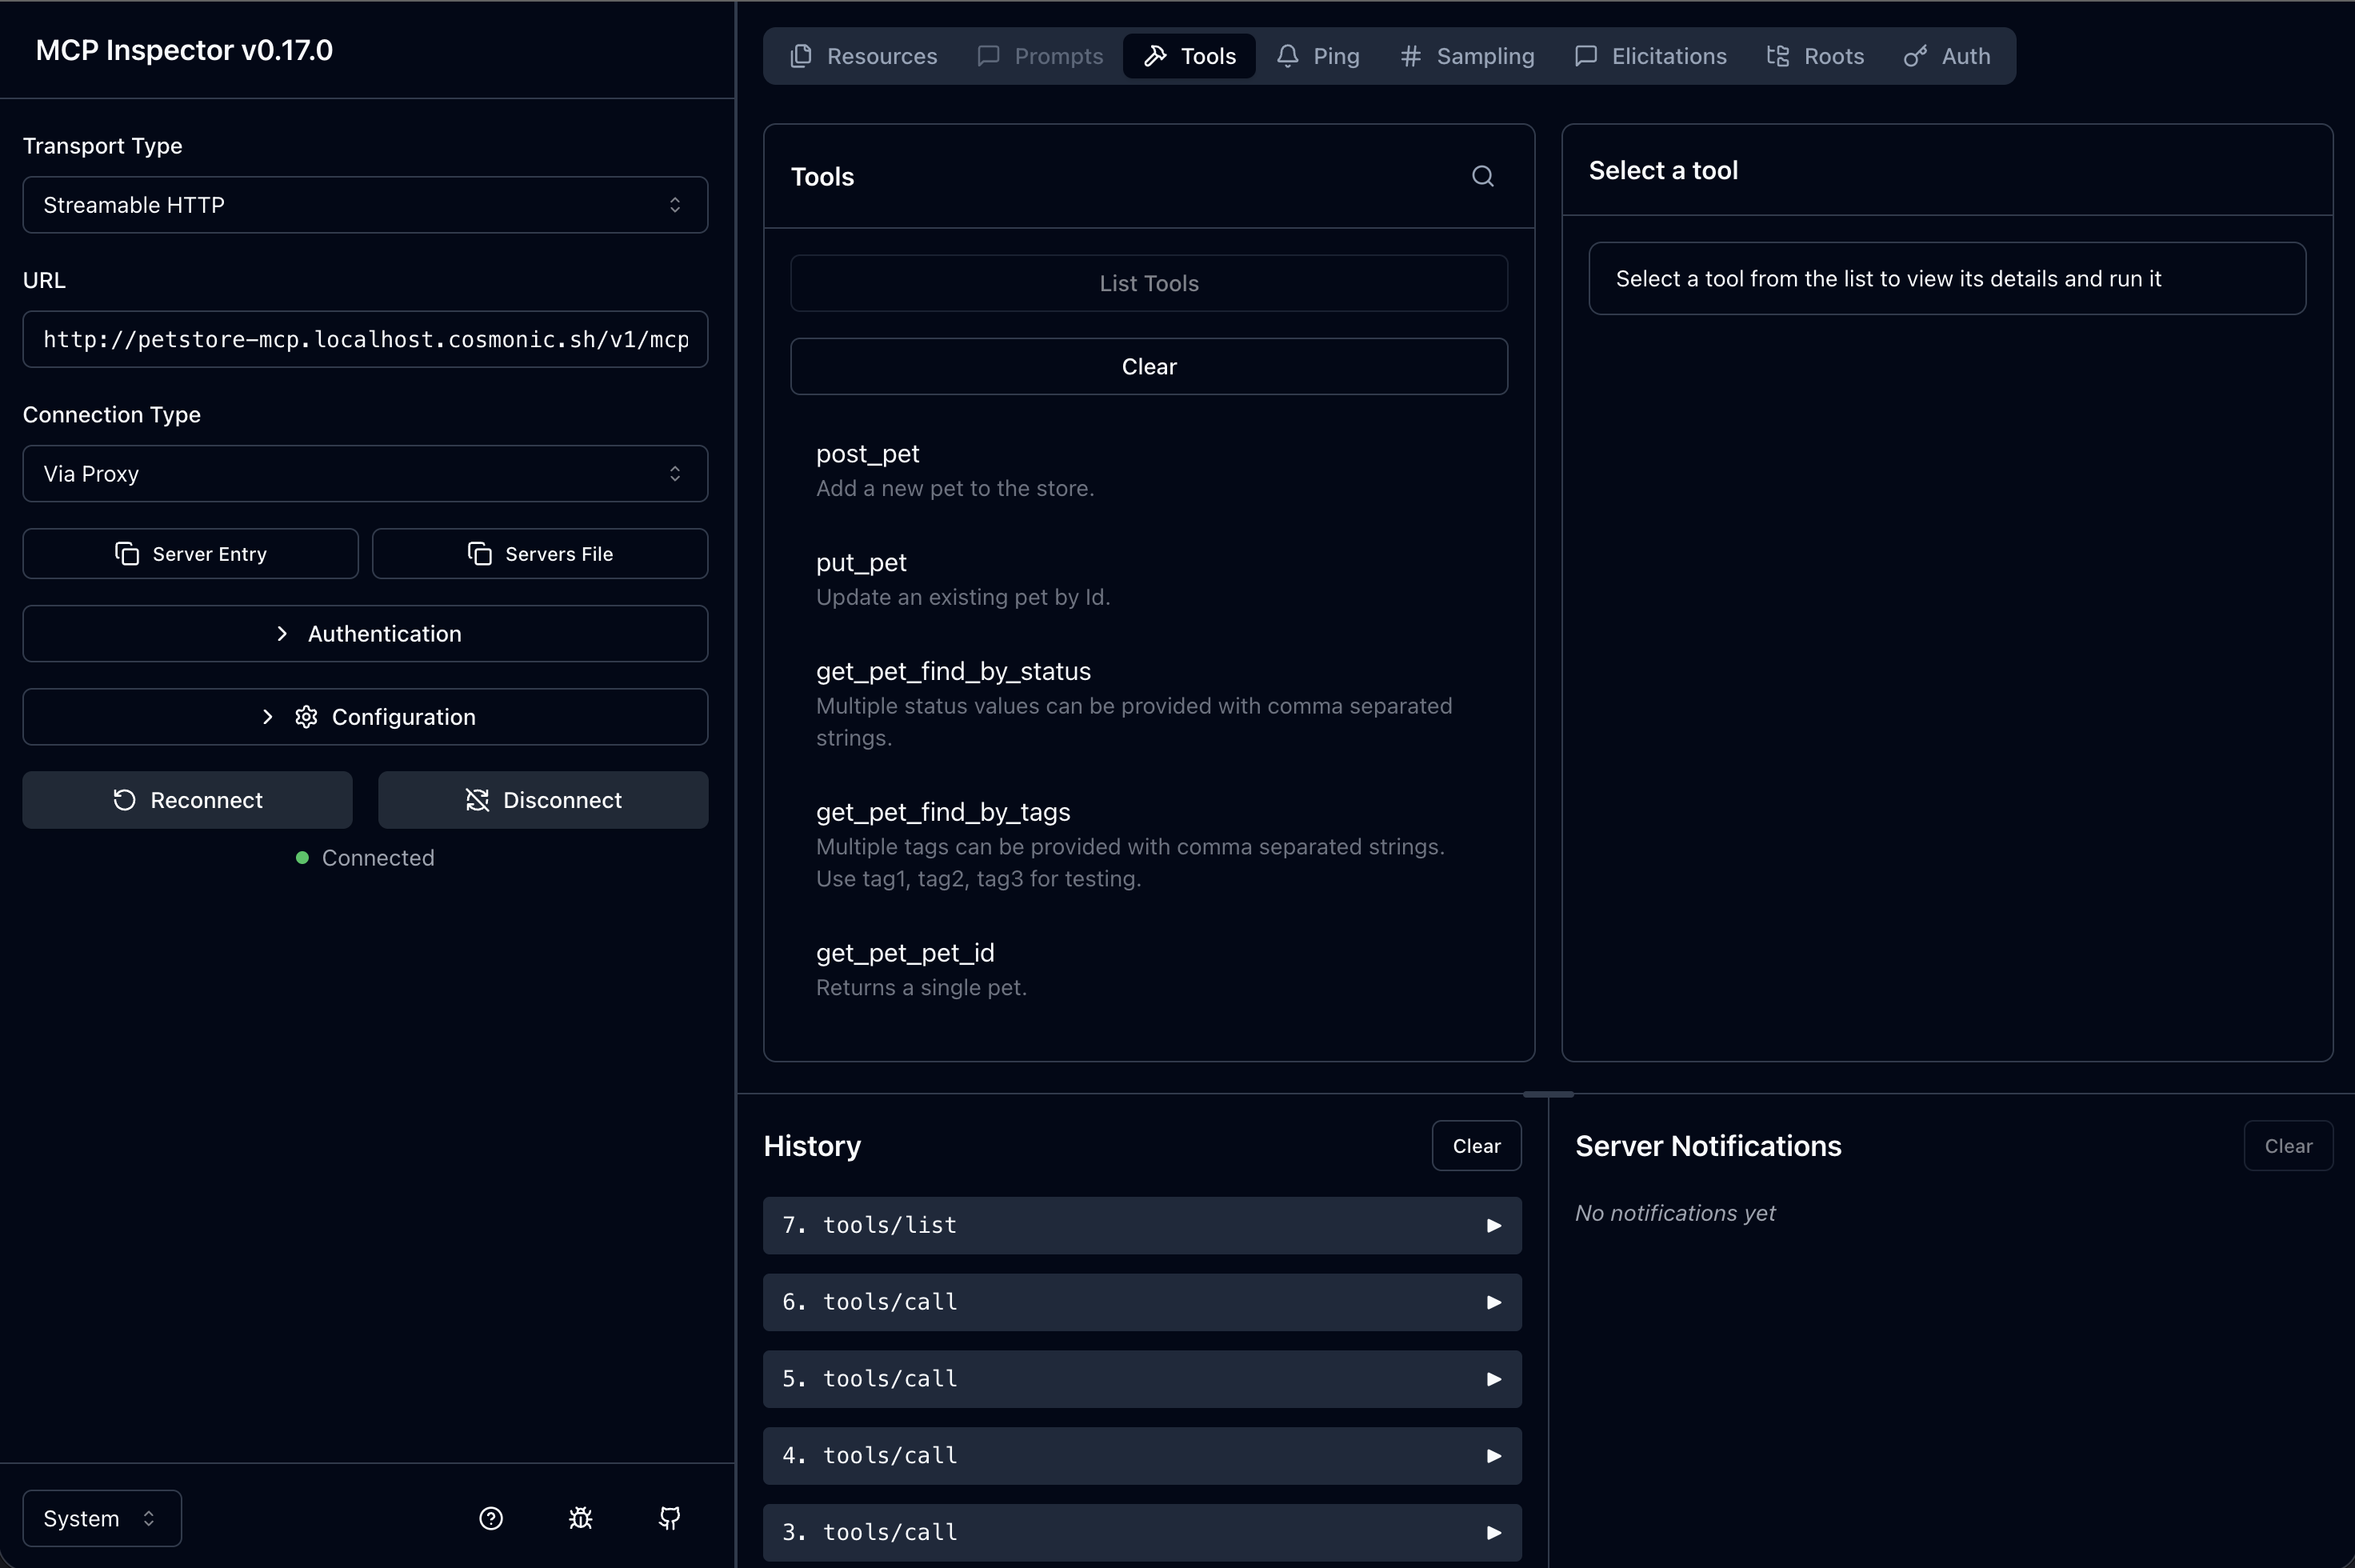
If you'd like to debug your MCP server, you can start the official MCP model inspector via the following command:
npx @modelcontextprotocol/inspector
Configure the MCP model inspector's connection:
- Transport Type: Streamable HTTP
- URL:
http://petstore-mcp.localhost.cosmonic.sh/v1/mcp - Connection Type: Via Proxy
You can explore the MCP Server's available tools in the Tools tab and list available resources in the Resources tab.